Posts

Showing posts with the label Walkthrough

Resident Evil 6 - Episode: A Gift from Ada - Overview

Image
A Gift from Ada is the Seventeenth and the last part of Leon's campaign and the third part (Episode) of the fifth chapter. This content covers a part of chapter five, known as “Quad Tower Roof”. Walkthrough: In the cutscene, Leon and Helena reach the rooftop and find they are surrounded by zombies. Leon spots a chopper and tells Helena that the chopper is the only transport they can use to get out from there. But before they proceed Simmons arrives at the rooftop. With his metasoma, Simmons grabs the other zombies and dissolves their bodies into him. Leon and Helena confront Simmons. Simmons seems weaker than before, and as a result, they easily defeat him. Just the time he defeated the other zombies ran toward and started eating him. After that with the stairs, they get on a wooden bridge to reach the other side. Once Helena asks Leon answers that, he thinks Simmons is not dead as he thought before. Through there they reach a door. Passing through the door they reach near the con...


Resident Evil 6 - Episode: The Quad Tower - Overview

Image
The Quad Tower  is the sixteenth part of Leon's campaign and the second part (Episode) of the fifth chapter. This content covers a parts of chapter five, known as “Quad Tower”. Walkthrough: In the square of the building the two check for surviving soldiers. They spot Derek Simmons and point their gun at him. Leon says “Back for more”. Ada arrives with her chopper. Simmons tells Ada that he knows that she did this to him and blames her for all she does. Leon then wishes for Simmons. Then Leon confronts Simmons. Simmons transforms into a dinosaur with an eye inside its mouth. Leon uses the explosives to cause heavy damage to him. Ada provides backup from the chopper. Simmons makes a huge noise that causes trouble for Leon and Helena. He transforms back into his human after taking certain damage. Once he is back in his human form, Leon engages in a fistfight with him. After that Simmons transforms back again to the dinosaur. Leon shoots and destroys the barrels twice as Derek trie...

Call of Duty: MW3 - Overwatch - Survival Mode (Special Ops) - Overview

Image
“ Overwatch ” is the third DLC map of Special Ops of Call of Duty: Modern Warfare 3. You can find the map in only in Survival Mode in Special Ops. It was released for Xbox 360 ELITE subscribers on February 21 st , 2012, and for PlayStation 3 Elite Subscribers on March 29 th , 2012. For non-elite Xbox member it was released on March 20 th and non-Elite PS3 players on April 20 th , 2012. You can play this mission in both solo and multiplayer mode. Call of Duty: MW3 - Special Ops DLC: Overwatch Map Overwatch is a tier 5 with Pretty Insane difficulty levels. Try to survive as many waves as you can. You will begin the mode equipped with a  Model 1887  Shotgun, a  Five Seven hand gun, a self-revive and an e xtreme conditioning . There are three armories in this mode you can unlock. The weapon armory will unlock after the first wave, the equipment armory after the second, and the air support armory will unlock after the third wave. You have to fight against Bomb Squads, Chemica...

Resident Evil 6 - Episode: Smokey Tatchi - Overview

Image
“ Smokey Tatchi ” is the fifteenth part of Leon's campaign and the first part (Episode) of the fifth chapter. This content covers three parts of chapter five, known as "Port Area", "High-Rise Area" and "Quad Tower Entrance". Walkthrough: In the cutscene, Chris tries to contact Leon from a fighter jet. Leon answers and informs that the situation getting worse there. It seems Chris gets angry hearing that. Leon also asks him to rescue Sherry and Jake from the underwater oil field. Leon mentions that Jack is Albert Wesker’s son. Chris is surprised to hear the name. Leon then informs that Jack has antibodies for the C-Virus. Chris says that he is moving toward the target. Before Leon disconnects Chris informs that Ada Wang is dead. Leon gets sad for her. Leon then tells Chris not to let Sherry and Jake down. Helena tries to comfort Leon. Leon tells her they should help the survivors and get out of Tatchi. One of the Echo team members contacted their HQ...

Call of Duty: MW3 - Liberation - Survival Mode (Special Ops) - Overview

Image
“ Liberation ” is the second DLC map of Special Ops of Call of Duty: Modern Warfare 3. You can find the map in only in Survival Mode in Special Ops. It was released for Xbox 360 ELITE subscribers on January 24 th 2012, and for PlayStation 3 Elite Subscribers on February 28 th , 2012. It was released for non-Elite PS3 players on April 21. Piazza and the rest of Collection 1 was released for PC on May 8 th , 2012. You can play this mission in both solo and multiplayer mode. Call of Duty: MW3 - Special Ops DLC: Liberation  Map Liberation is a tier 2 with regular difficulty levels. It takes place in Central Park in Manhattan, New York City. Try to survive as many waves as you can. You will begin the mode equipped with a USP .45 hand gun, two frag grenade, two flash grenade, a self-revive and a vest. There are three armories in this mode you can unlock. The weapon armory will unlock after the first wave, the equipment armory after the second, and the air support armory will unlock afte...

Call of Duty: MW3 - Piazza - Survival Mode (Special Ops) - Overview

Image
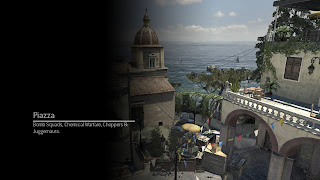
“ Piazza ” is the first DLC map of Special Ops of Call of Duty: Modern Warfare 3. You can find the map in only in Survival Mode in Special Ops. It was released for Xbox 360 ELITE subscribers on January 24th 2012, and for PlayStation 3 Elite Subscribers on February 28th, 2012. It was released for non-Elite PS3 players on April 21. Piazza and the rest of Collection 1 was released for PC on May 8th, 2012. You can play this mission in both solo and multiplayer mode. Call of Duty: MW3 - Special Ops DLC - Piazza Map Piazza is a tier 2 with regular difficulty levels. Try to survive as many waves as you can. You will begin the mode equipped with a Five-Seven hand gun, two frag grenade, two flash grenade, a self-revive and a vest. There are three armories in this mode you can unlock. The weapon armory will unlock after the first wave, the equipment armory after the second, and the air support armory will unlock after the third wave. You have to fight against Bomb Squads, Chemical Warfare, Chopp...

X-Men Origins: Wolverine - The Great Escape - Gameplay

Image
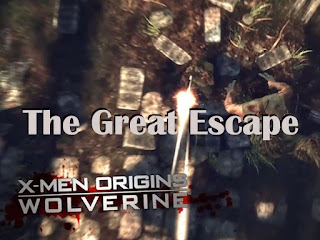
This part covers three objectives of the game, “ Healing Factor ”, “ Feral Senses ” and “ The Great Escape ”. Objective Healing Factor Logan exits the lab. He spots some sentry gun blocking his way. To avoid detection he takes cover in another lobby. He then moves into a room to his left of the lobby. He kills a guard there and exits another lobby. There he destroys one sentry gun and moves down the stairs. He enters a room on the left and spots several sentries placed to hunt him down. He overheard the discussions of the guards there. He manages to move to the next room dodging the guns. Entering the room he uses a power core to open a door. The power core also activated a control panel. Using the panel he brings a shield near the door. Then he detached the power core and reinstalled it again to send the shield to its place. He used the shield as cover and reached corridor 09. Logan use the ventilation tunnel to move to the next room. One of the soldiers starts shooting at the t...

Call of Duty: MW3 - Downturn - Survival Mode (Special Ops) - Overview

Image
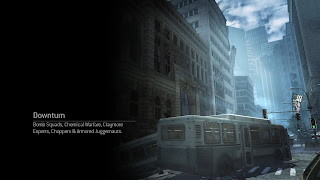
“ Downturn ” is the fifteenth map of Special Ops content of Call of Duty: Modern Warfare 3. You can find the map in only in Survival Mode in Special Ops. You can play this mission in both solo and multiplayer mode. The mission takes places on Wall Street, in New York City. Call of Duty: MW3 - Special Ops: Downturn Map Downturn is in tier 4 with insane difficulty levels. Try to survive as many waves as you can. You will begin the mode equipped with a M16A4, Five-Seven hand gun, and a vest. There are three armories in this mode you can unlock. The weapon armory will unlock after the first wave, the equipment armory after the second, and the air support armory will unlock after the third wave. You have to fight against Bomb Squads, Chemical Warfare, Claymore Experts, Choppers, Riot-shield Juggernauts, and Dogs. Gameplay of Map Downturn: Previous Map: Arkaden                                     ...

Call of Duty: MW3 - Arkaden - Survival Mode (Special Ops) - Overview

Image
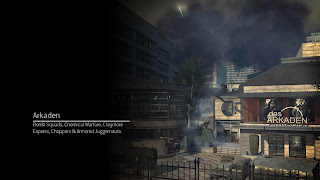
“ Arkaden ” is the fourteenth map of Special Ops content of Call of Duty: Modern Warfare 3. You can find the map in only in Survival Mode in Special Ops. You can play this mission in both solo and multiplayer mode. Call of Duty: MW3 - Special Ops: Arkadan Map Arkaden is in tier 4 with insane difficulty levels. Try to survive as many waves as you can. You will begin the mode equipped with a M16A4, Five-Seven hand gun, and a vest. There are three armories in this mode you can unlock. The weapon armory will unlock after the first wave, the equipment armory after the second, and the air support armory will unlock after the third wave. You have to fight against Bomb Squads, Chemical Warfare, Claymore Experts, Choppers, Riot-shield Juggernauts, and Dogs. Gameplay of Map Arkaden: Previous Map: Lockdown                                                    ...

Call of Duty: MW3 - Lockdown - Survival Mode (Special Ops) - Overview

Image
“ Lockdown ” is the thirteenth map of Special Ops content of Call of Duty: Modern Warfare 3. You can find the map in only in Survival Mode in Special Ops. You can play this mission in both solo and multiplayer mode. Call of Duty: MW3 - Special Ops: Lockdown Map Outpost is in tier 4 with insane difficulty levels. Try to survive as many waves as you can. You will begin the mode equipped with a M16A4, Five-Seven hand gun, and a vest. There are three armories in this mode you can unlock. The weapon armory will unlock after the first wave, the equipment armory after the second, and the air support armory will unlock after the third wave. You have to fight against Bomb Squads, Chemical Warfare, Claymore Experts, Choppers, Riot-shield Juggernauts, and Dogs. Gameplay of Map Lockdown: Previous Map: Outpost                                                      ...

Resident Evil 6 - Episode: Attack on Tatchi - Overview

Image
“ Attack on Tatchi ” is the fourteenth part of Leon's campaign and the second part (Episode) of the fourth chapter. This content covers two parts of chapter four, known as “Medical Research Center” and “Train”. Walkthrough: Exiting the market Leon and Helena notice Ada entering a building. They decide to move after her. They enter the building. Leon calls her as she is about to pass a door. Ada turns while opening the door but she escapes as the other starts shooting her. Leon and Helena start to track Ada. They take another door downstairs to follow Ada. They move in and see an elevator's arrival, the two then run for the elevator. During the run Leon overhears some conversation about ignoring them and tracking Ada, he also sees Ada on the upper platform. Seems that Ada is controlling the building and trying to stop them. Ada activated a leaser trap but the two managed to get on the elevator. They reach the upper floor with the elevator. As the lobby is trapped with leaser...